Monday, November 18, 2024


My daughter and I are obsessed with watching Master Chef Australia. This reality TV series, based on the original British MasterChef began in April 2009 and is still running strong. The format has varied a bit from season to season, but the basic concept is that 24 non-professional cooks are pitted against one another. One by one, through various challenges and eliminations, their numbers are reduced until one reigns supreme and is awarded the title of Australia’s “Master Chef.”

We find this version of Master Chef much more enjoyable and relatable than all the others (and we’ve watched more than a few). The Australia version allows us to watch the cooks plan, assemble ingredients, prep, and take that concept to the final product.
It’s actually instructional, and (more than a few times) I find my 60-years-of-cooking self imploring a contestant to take another approach, use another pan, scrap Plan A …

Why am I telling you this?

Well, the locality (Australia) brings more than a few experienced Asian home cooks into the competition, and they reward us with the many, many ways of preparing and presenting curry dishes.

Curry is not one singular taste; curry is a multi-dimensional experience of the perfect blend of sweet, sour, tangy, earthy tastes with exciting pops of heat. It’s an explosion of flavor and one that, until Beth and I began watching our fave TV show, we had not dared experience.

We’re still newbies in this curry thing. But last night I presented my family with this dish, and in Master Chef fashion, they gave me a 10/10.

Ingredients

  • 1 tablespoon olive oil
  • 1 1/2 tablespoons ginger paste
  • 3 tablespoons red Thai curry paste
  • 6 ounces coconut milk
  • 3 cups cherry tomatoes
  • 4 5- to 6-ounce boneless skinless cod filets
  • salt and pepper
  • 1/2 fresh lime
  • chopped cilantro or basil leaves for garnish

Instructions

(1) Preheat oven to 300 degrees F. (149 degrees C.)

(2) Heat olive oil in a large sauté pan over medium-high heat. Add the ginger and red curry pastes and cook, stirring constantly, until the mixture is fragrant and begins to stick to the pan.

Red Thai curry paste and ginger paste sautéing

(3) Add the coconut milk and tomatoes to the pan and reduce the heat to low to just barely maintain a simmer. Cook, stirring occasionally, until the tomatoes begin to burst, about 5 minutes. Remove the pan from the heat and set aside.

(4) Pat the cod filets dry with paper towels. Season both sides with salt and pepper. Nestle the filets in the tomato/curry sauce. Bake in the oven until the cod is done — firm to the touch and easily pierced with the tip of a knife. This should take about 18 to 20 minutes.

You’re right — I used 3 filets instead of 4 because there are only 3 of us eating but I didn’t reduce the amount of sauce (it’s almost slurp-able).

(5) Squeeze the fresh lime over the fish and garnish with fresh cilantro and/or basil leaves.

This is not a bold curry with layer upon layer of flavors. It’s really quite tame — let’s call it a curry “starter kit.” After our experience with creating this dish, my daughter and I have plans to expand our repertoire, injecting flavor into our future curries with tamarind, curry leaves, fresh chili peppers, cardamom … and?

Pasta Fagioli


Makes 6–8 servings

Ingredients

  • 2 cups dry cannellini beans (see note below)
  • 7 cups of water
  • 1 cup finely diced yellow onion
  • 1 tablespoon olive oil
  • 2 cloves garlic, minced
  • 4 slices pancetta, chopped
  • 4 cups low-sodium chicken broth
  • 1½ cups uncooked ditalini
  • 2 teaspoons fresh minced rosemary
  • Parmesan
  • Pesto

Note: If you cannot find cannellini beans, Great northern beans are a good substitute. Don’t use navy beans.

Instructions

  1. First, sort and wash your beans. What do I mean? Spread them out on a cookie sheet and pick through them, looking for rocks, small clumps of dirt, or shriveled beans. Trust me, you don’t want to have those things in your soup. Beans are not washed when they are harvested. Any moisture would cause them to mold, so after sorting, please wash your beans to remove the field dust.
  2. Place the beans and water in a crockpot (slow cooker). Cook on high for 4 hours. After 4 hours, the beans should be perfectly tender but not mushy. They should be intact but creamy on the inside.
  3. Place the onion and olive oil in a stockpot or large pot with a lid. Cook over low heat for 10 minutes. Add the minced garlic and pancetta. Stir and continue to cook over low heat until the onions are soft and golden, the garlic is fragrant and gently colored, and the pancetta is beginning to crisp. (Note that it will continue to cook in the soup).
  4. Add the broth to the pot and bring to a boil over medium-high heat.
  5. Stir in the pasta; reduce the heat to medium-low (just enough to maintain a gentle simmer). Cook the pasta according to the instructions on the package, stirring occasionally until done.
  6. Add the rosemary and the cooked beans to the pot (there should be very little residual cooking water).
  7. Reduce the heat to low; stir to combine and allow to simmer together for a few minutes for the flavors to meld. The mixture will be very thick.
  8. Serve in bowls; garnish with pesto and/or grated Parmesan if desired.

Saturday, October 19, 2024


Carb Diva’s Easy Peasy Pasta Carbonara

Serves 4

Equipment You Will Need

  • 1 large pot for boiling the pasta
  • 1 colander for draining the pasta
  • A large heat-resistant bowl (the one I use is ceramic); it must be large enough to accommodate the colander (the latter nestles in the former)
  • A slightly smaller bowl in which to rest the colander while the “magic” happens (I’ll explain that in Steps 5 thru 9 below)
  • 1 glass measuring cup (a 1-cup/8 ounce cup is perfect)
  • Tongs or a pasta fork/server for tossing the pasta

Ingredients

  • 6 slices of bacon, diced
  • 1/2 tablespoon minced garlic
  • 2 large eggs
  • 1/2 teaspoon freshly ground black pepper
  • 1/2 cup plus 2 tablespoons grated Parmesan cheese
  • 1/2 tablespoon olive oil
  • 1/2 pound of dry spaghetti pasta

Instructions

  1. Cook the diced bacon in a sauté pan over medium heat until crispy-crunchy. Just before the bacon is done to your liking, toss in the minced garlic. Remove the pan from the heat and set aside to cool.
  2. Next, whisk together the eggs, pepper, Parmesan, and olive oil in a small bowl. Set aside.
  3. While the bacon/garlic is cooling, bring 1 quart (4 cups) of water to a boil over high heat. Yes, I know that seems like “not enough” water, but the reason is this — you want, nay you need starchy water for this recipe to work. Note that I didn’t add salt to the water. The bacon and Parm should add a sufficient amount of saltiness to the finished dish.
  4. Add the pasta to the boiling water and cook, stirring occasionally until “al dente.” My co-editor Dim Nikov gives an excellent explanation of that here. For me and the type of spaghetti I purchase, I find that 11 minutes is the sweet spot.
  5. OK, the next few steps are where you find the magic, the “aha moment” that brings this all together. Place the colander in the large (ceramic) bowl. Pour the contents of the pasta pot (pasta and water) into the colander.
  6. Carefully (everything’s screaming hot) pick up the colander which is holding that glorious cooked pasta, and rest it in the smaller bowl. (It will just be there for a few moments.)
  7. Using the measuring cup, scoop up 1/2 cup (or a little more) of starchy pasta water from the large bowl. Set that 1/2 cup of water aside. Dump out the remaining pasta water that remains in the large ceramic bowl.
  8. Dump the cooked pasta from the colander back into the large ceramic bowl. That bowl, because it held the starchy pasta water for a minute is now quite warm (almost hot to the touch).
  9. Pour 1/4 cup of the reserved pasta water into the eggs/Parmesan and stir quickly. The hot pasta water will temper the eggs. Now, pour that eggy/Parmy/watery stuff over the pasta and begin tossing, tossing, tossing. Don’t stop. You’re going to do this for 2 minutes. And, after those 2 minutes the eggy-ness will transform into a comforting creamy-ness. If it seems a little too “tight” (too thick, goopy) feel free to drizzle in some of the remaining 1/4 cup of pasta water in that glass measuring cup.
  10. Now, grab that pan of bacon/garlic that has been waiting ever-so-patiently on the sidelines. You thought I’d forgotten about it, didn’t you? Scrape the contents of that pan into your carbonara; give a few more tosses to combine everything and serve to your adoring fans.

There you have it. Pasta carbonara that’s thriftier than the “traditional” but (almost) just as tasty. You have a creamy sauce without the use of cream, and you have silky pasta, not hot noodles with scrambled eggs. What could be better?

Want to add even more Parmesan cheese or an extra grinding of black pepper? I sure won’t complain.

A Few Notes

First, I know that carbonara purists are screaming “Where’s the guanciale?” and “How in Heaven’s name could you use bacon? That’s sacrilege.” I know, I know, I get it. But … not all of us live even remotely close to an Italian deli. I’m trying to make this recipe approachable for the masses.

Second, even more of you (added to those in Note #1) are complaining that I use whole eggs, not the yolks alone. I’m a frugal cook — God knows I hate wasting even a couple of silly egg whites. Again, I’m thinking that not long ago eggs were an economical source of protein for just about any family. In my part of the world the price has more than doubled in just the last year.

Wednesday, September 11, 2024

Easy Thai Chicken with Peanut Sauce


Winner Winner Chicken Dinner

Are you tired of the same old chicken dinner week after week? Do you find chicken breasts to be dry and flavorless? I have an easy recipe that will wake up your tired taste buds. This easy-to-fix chicken meal checks all the boxes:

  • Ready to eat in about 30 minutes
  • Packed full of flavor
  • Tender chicken thighs are moist, never dry

Ingredients (Serves 4)

  • 1 tablespoon olive oil
  • 4 bone-in chicken thighs, skin removed
  • 1 14-ounce can coconut milk
  • 3/4 cup creamy peanut butter
  • 3 cloves minced garlic
  • 2 teaspoons fish sauce
  • 1 tablespoon soy sauce
  • 2 tablespoons red curry paste
  • 1 1/2 tablespoons brown sugar
  • 2 tablespoons lime juice
  • fresh cilantro or basil leaves for garnish (optional)
  • chopped unsalted peanuts for garnish (optional)

Instructions

  1. Heat the olive oil in a large (12-inch) saute pan over medium heat until it begins to shimmer.
  2. Add the chicken thighs, reduce the heat to low, and cook for about 15 minutes or until golden on one side. Flip and continue to cook for about 10 minutes more until golden on the other side.
  3. Remove the chicken to a plate and set aside. At this point, I removed the bones from the thighs but you can leave them in—your choice.
  4. In the same pan add the coconut milk, peanut butter, garlic, fish sauce, soy sauce, red curry paste, and brown sugar. Bring to a simmer over medium heat and cook for 2 minutes to blend the flavors.
  5. Return the chicken to the pan and simmer, uncovered, until the chicken is cooked through and the sauce has reduced a bit (about 5 minutes). Test the chicken with an instant-read thermometer. It must read 165 degrees F. (75 degrees C).
  6. Garnish the chicken with fresh cilantro and/or chopped peanuts if desired.

I served our chicken with steamed green beans and couscous. Yes, I know that couscous is not a traditional side dish, but it's super quick (5 minutes), and full of whole-grain goodness.

A salad with fresh vegetables (broccoli florets, red bell pepper, shredded carrot, snow peas, and cucumber are just a few examples) would also be a healthy accompaniment.

Wednesday, July 3, 2024

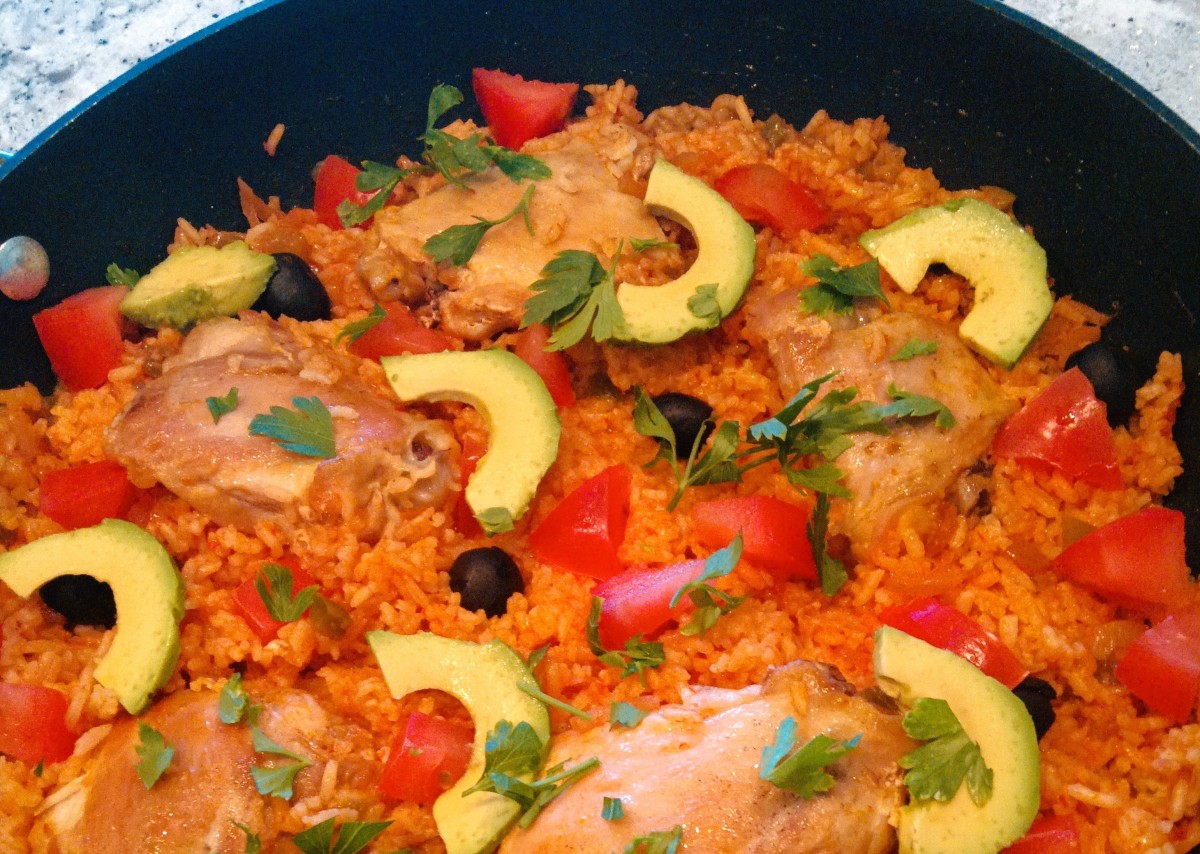
Tex-Mex Chicken Thighs and Rice


Tex-Mex chicken thighs with rice

It Began With Half an Avocado

In my corner of the world, avocados are ridiculously, outrageously expensive. And, if you've been reading my articles for a while, you know that thrifty is my middle name. Waste nothing ... not even half of an avocado.

I was faced with that dilemma a few days ago. Half an avocado in need of a good home/recipe. Salad is the obvious (easy) choice, but I don't do easy. Here's what I came up with.

Tex-Mex Chicken Thighs and Rice

Ingredients

  • 6 skinless chicken thighs, bone-in
  • 1/2 teaspoon salt
  • 1/4 teaspoon black pepper
  • 1 tablespoon olive oil
  • 2 cloves garlic, chopped
  • 1/2 onion, diced (about 1/2 cup)
  • 1 1/3 cups uncooked long-grain rice
  • 1 cup salsa (mild or medium, depending on how spicy you like it)
  • 2 cups chicken broth
  • 1 teaspoon ground cumin
  • 1/4 cup black olives, optional
  • 1/4 cup fresh cilantro, chopped
  • sour cream and avocado to garnish (optional)

Instructions

  1. Season the chicken with salt and pepper. Heat the oil in a large, deep cast iron skillet/or pan (over 30 cm or 12-inches) over medium-high heat. Add the chicken and as soon as it begins to sizzle, turn the heat down to low and cook uncovered. We're going to cook these thighs low and slow, creating browning which equals flavor. After 10 minutes the thighs should be golden on one side.
  2. Increase the heat to medium-high once again. Turn each thigh and when you hear the sizzle, reduce the heat to low once again. Continue to cook until the 2nd side of the chicken is golden. Transfer the chicken to a warm plate.
  3. Add the onion to the pan and increase the heat to medium; fry for about 3 minutes or until the onion is translucent. Next, add the garlic to the pan; stir and cook for 30 seconds. Stir in the rice, salsa, chicken broth, cumin, and olives if using.
  4. Place chicken thighs on top of the rice. Bring to a boil; rotate the chicken in the salsa sauce to coat. Reduce the heat to low and cover with a lid. Cook for 20 minutes or until the rice is tender and the liquid is absorbed. Add an extra 1/4 cup of water only if needed (if the rice hasn't cooked fully).
  5. Garnish with cilantro, sour cream, and avocado if desired.

Tuesday, May 21, 2024

An Italian Twist to Chicken and Rice


Ingredients

  • 4 boneless, skinless chicken thighs
  • 1/4 teaspoon Kosher salt
  • 1/4 teaspoon freshly ground black pepper
  • 2 teaspoons olive oil
  • 1 cup minced white or yellow onion
  • 1 cup finely diced red bell pepper
  • 1/3 cup oil-packed sundried tomatoes, diced
  • 4 boneless, skinless chicken thighs
  • 1 1/2 cups orzo (rice-shaped wheat pasta)
  • 1 15-ounce can tomatoes, crushed
  • 1 3/4 cups chicken broth
  • 1/4 cup basil pesto
  • 1/2 of a small lemon
  • Flat leaf parsley for garnish (optional)

Instructions

  1. Heat the olive oil in a large saute pan over medium-high heat until shimmering. Season the chicken thighs with salt and pepper. Carefully add the chicken to the pan (there will be some sputtering) and lower the heat to medium-low.
  2. Slowly cook the thighs until golden brown on one side, about 5 minutes. Flip the chicken and cook on the other side for an additional 5 minutes or so until golden. Remove from the pan and set aside. (Note, the chicken will not be done; it will continue to cook in the pan with the other ingredients in a few minutes.)
Chicken is golden but not completely cooked. Waiting to go back into the pan

3. In the same pan add the onion, bell pepper, and oil-packed sundried tomato. Cook over medium heat, stirring frequently, until the vegetables have softened.

4. Add the orzo to the pan and stir to coat with the oil from the tomatoes and cooking fat from the chicken. Cook for several minutes, stirring often, to toast the orzo.

Orzo is golden

5. Increase the heat to high; add the tomatoes, broth, and pesto and stir. Return the chicken to the pan and nestle it in with the orzo and broth. Reduce the heat to low; cover and simmer until the orzo is done, about 15–20 minutes.

6. Remove the lid; stir the orzo and take a spoonful to be sure that it is cooked. Taste for seasoning and adjust as needed. A squeeze of lemon juice will make the flavors pop and might be the only other seasoning you need. Garnish with parsley and serve with a tossed green salad.

Saturday, January 27, 2024

French Onion Chicken and Pasta


The Weather Outside Is Frightful

I live in the United States—you'll find me in the upper left-hand corner of the map, the Pacific Northwest, specifically Washington. Washington, the "Evergreen State." Evergreen because, as you've heard, it rains here ... a lot.

As I write it's the dead of winter. The sun goes down at 4:00 p.m. and sunrise isn't until about 8:00 in the morning. I'm beginning to forget what the sun looks like, and we are all desperately in need of comfort food. Soups and stews are on the menu rotation along with this dish I created for dinner last night—French onion chicken and pasta.


Ingredients

  • 4 skinless, bone-in chicken thighs, medium size
  • 2 tablespoons olive oil
  • 1 tablespoon unsalted butter
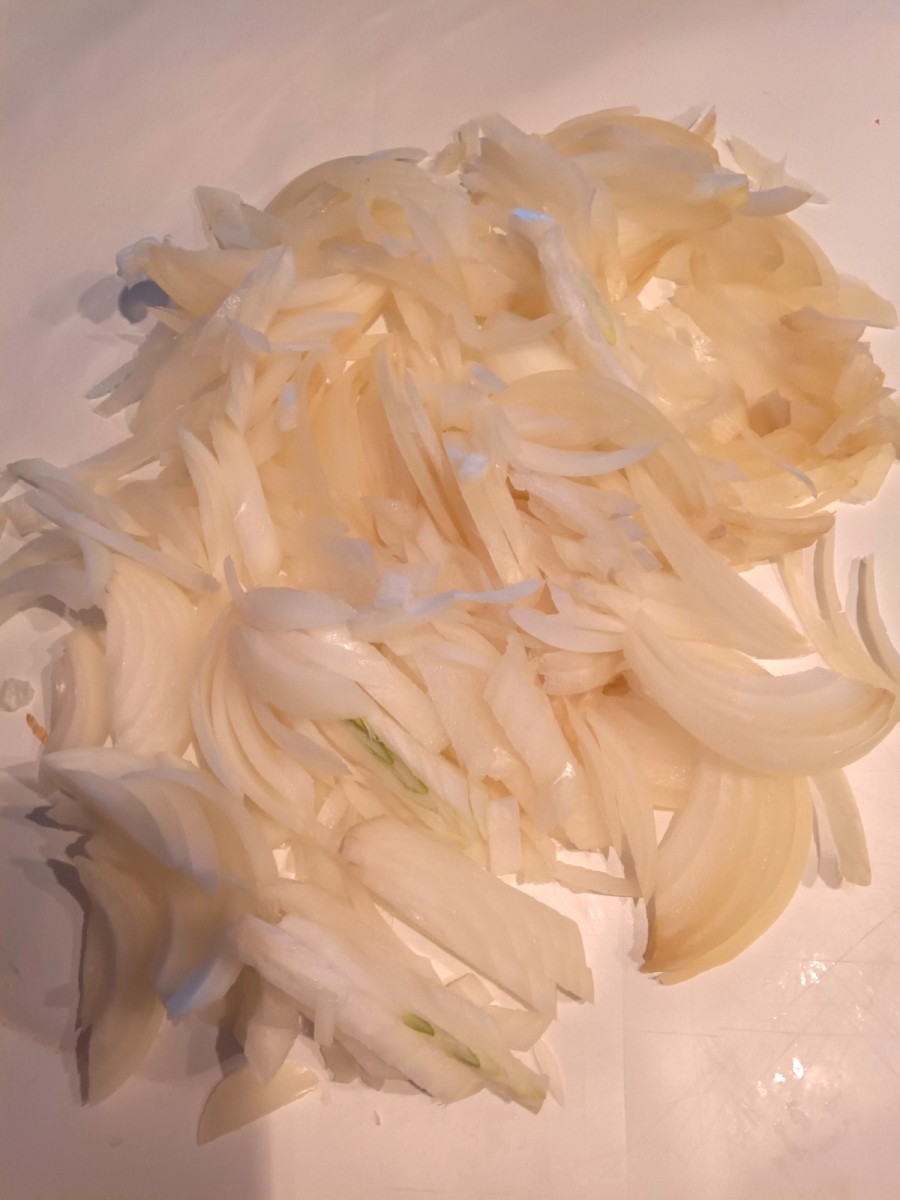
  • 3 cups yellow onions, sliced vertically (see note)
  • 1/4 cup dry sherry
  • 1 tablespoon all-purpose flour
  • 4 cups beef stock
  • 8 ounces dry pasta, orecchiette or other shell-shaped pasta
  • 1/2 cup Gruyere cheese, shredded, for garnish

Instructions

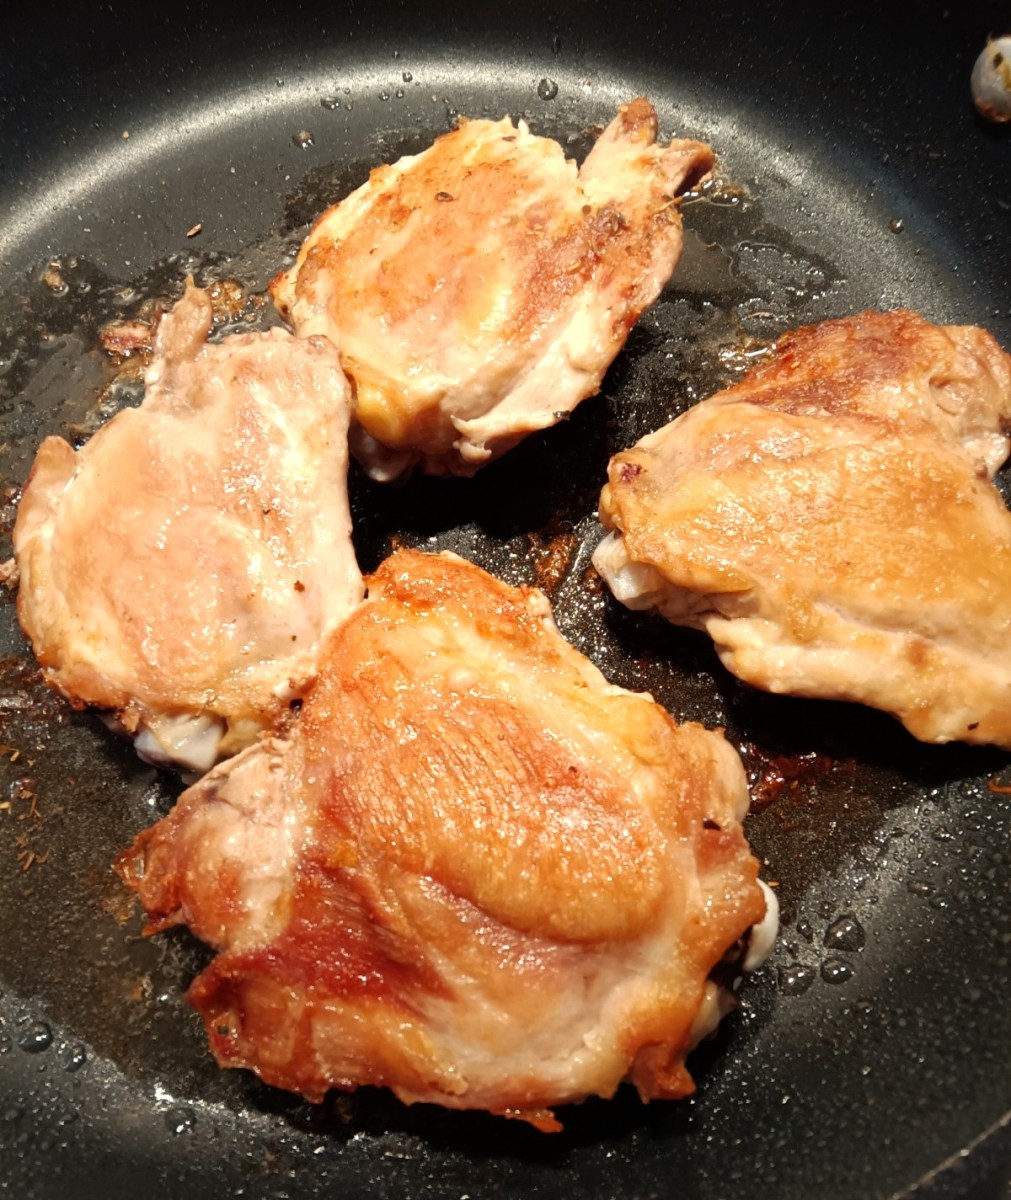
  1. Heat olive oil in a large saute pan over medium heat. Pat the chicken thighs dry with paper towels and then season both sides with salt and pepper. Reduce the heat to low and slowly saute the thighs until richly browned on one side, about 10 minutes.
  2. Flip the chicken thighs over and cook on the other side until brown, about 10 minutes more. This low and slow cooking makes the thighs meltingly fork tender and creates fond in the bottom of the pan (I'll explain that in Step 3). Remove the chicken from the pan and set aside.
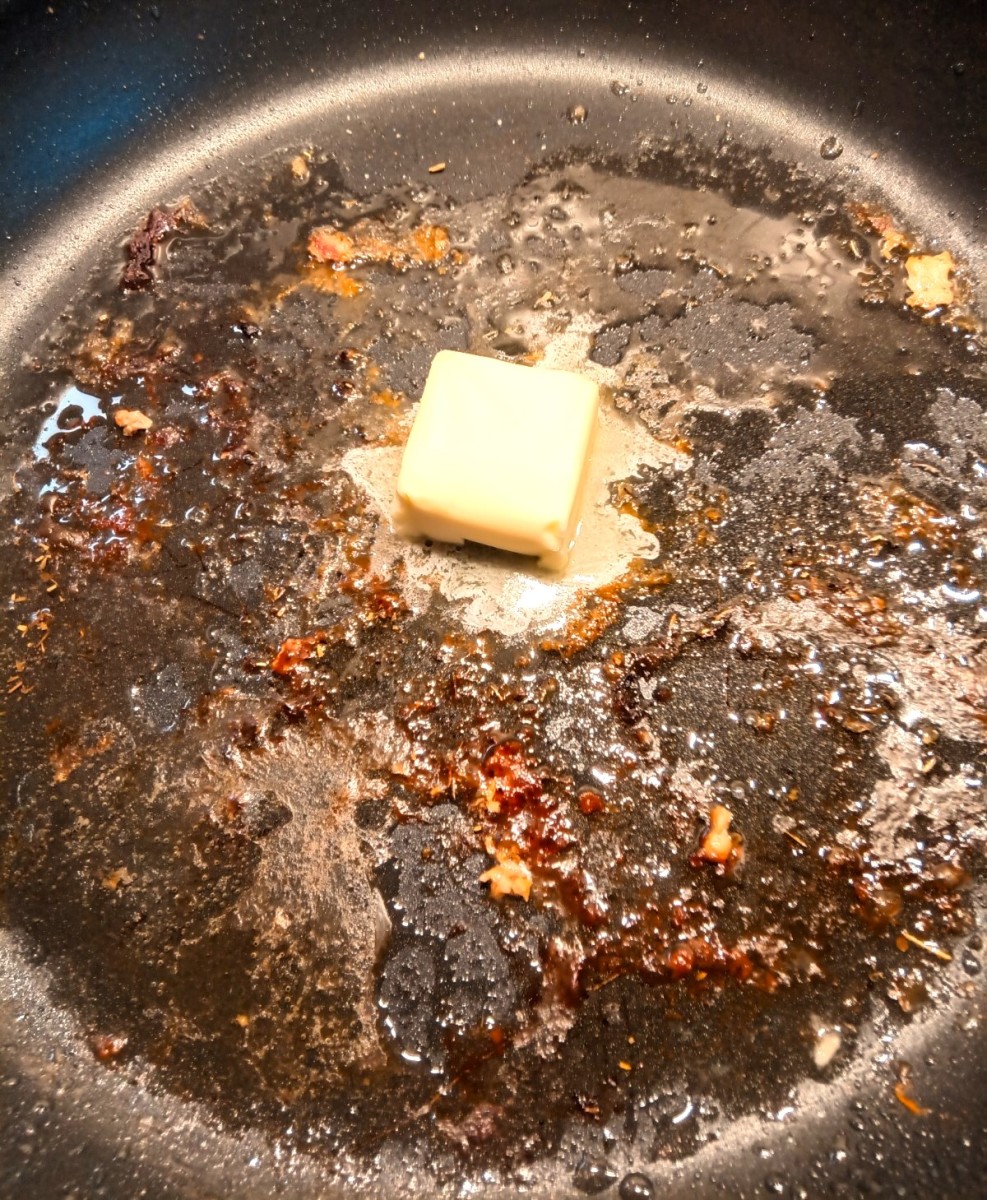
  3. The bottom of the pan contains yummy bits from cooking that chicken; this is called "fond" and is an important part of the success of this dish. Fond equals flavor.
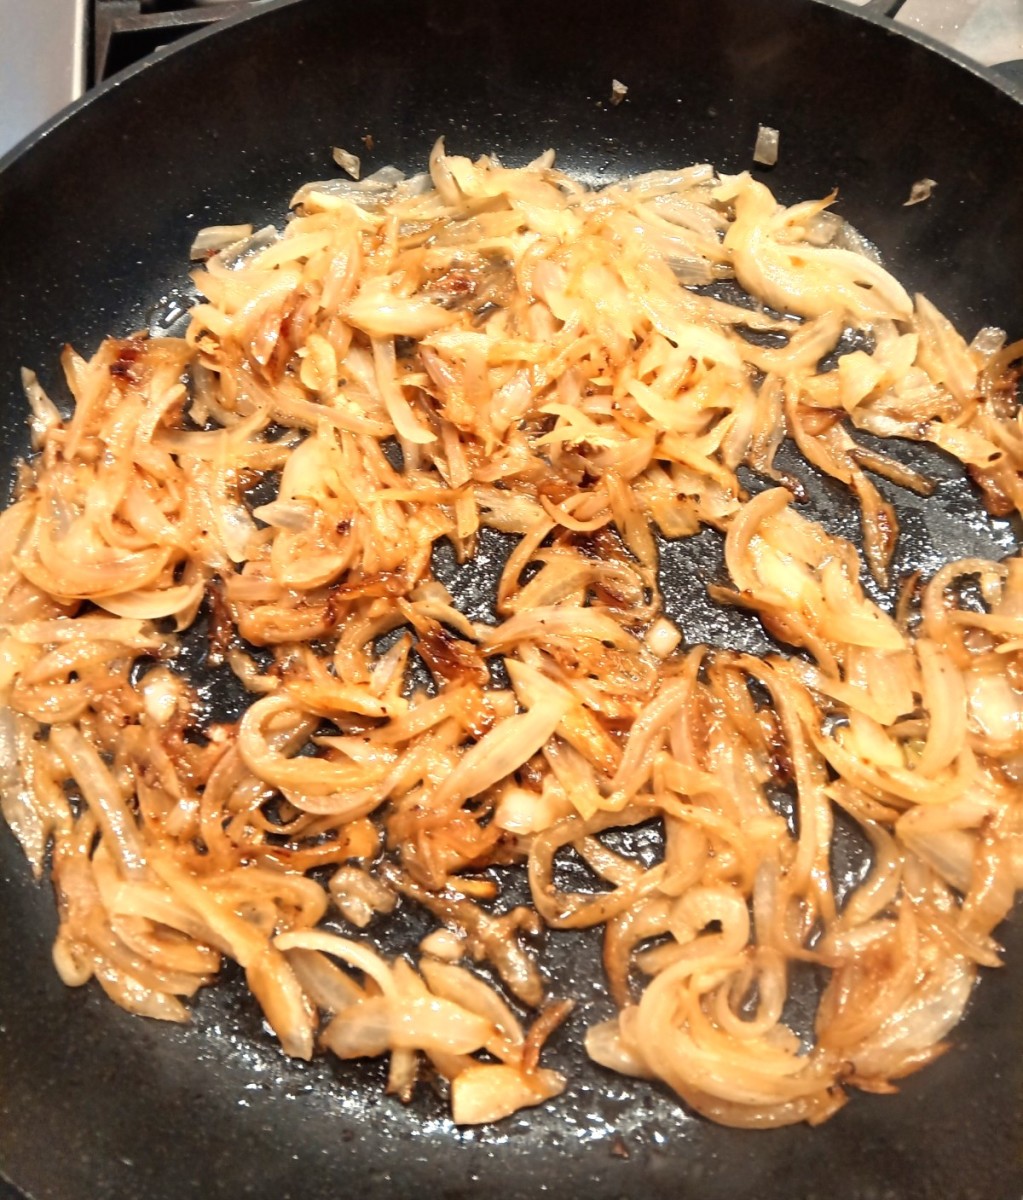
  4. Increase the heat to medium; add the butter to the pan and once it melts add all of the onions. Yes, it looks like a lot of onions, but keep in mind that onions are about 89 percent water. As soon as you hear the onions begin to sizzle, turn the heat back down to low. Cook the onions, stirring occasionally, until they are a luscious golden brown. This will take at least 30 minutes. You might be tempted to increase the heat to hurry the process; please don't. If cooked with higher heat the onions will burn and become bitter tasting. Your patience will be rewarded. (By the way, slicing the onions pole to pole means that you cut them from stem end to bottom, not horizontally.)
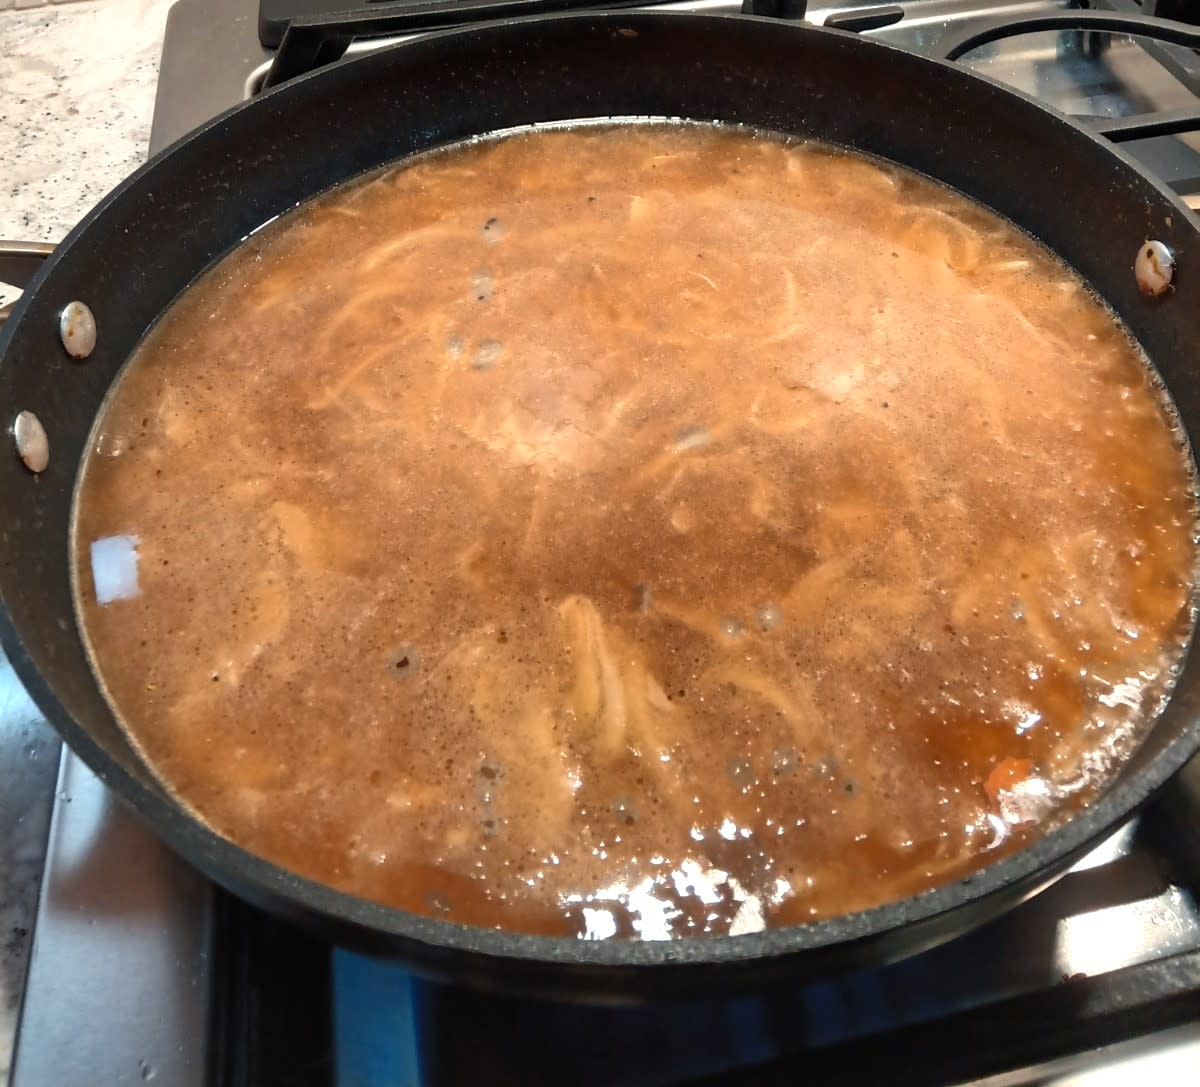
  5. When the onions are golden increase the heat to high. Add the sherry and stir until the sherry evaporates. Add the flour and stir to coat the onions. Add the broth and stir to mix everything together.
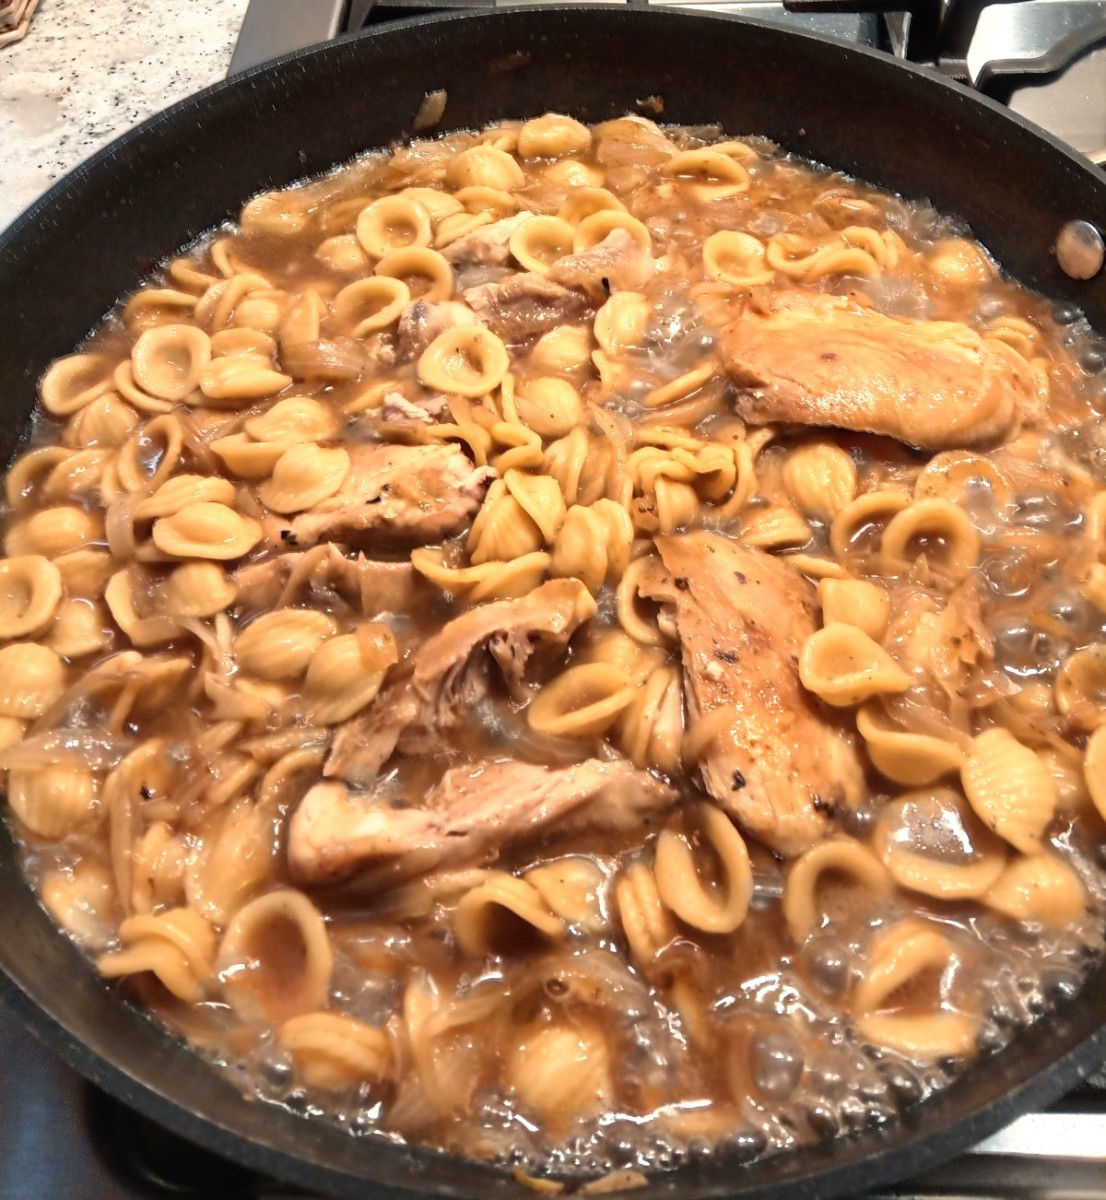
  6. When the mixture is boiling add the pasta all at once. Stir to combine and then turn the heat down so that the mixture just barely simmers. Cook, stirring occasionally, until the pasta is tender (the orecchiette I used took about 15 minutes to cook.) Several things happen in this step; the pasta absorbs the flavors in the broth, the broth reduces slightly, and the pasta releases its starch into the broth to help thicken and create a sauce.
  7. While the pasta is cooking, remove the cooked chicken meat from the bone. You can omit this step if you wish, but deboning the chicken makes this dish a little easier to eat. When the pasta is tender, nestle the cooked chicken back into the pan and toss to coat with the sauce. Serve, and garnish with cheese. I served this meal with sauteed kale.

Photo Guide

Richly browned chicken thighs
Source: Linda Lum
Butter and fond in the saute pan
Source: Linda Lum
3 cups of onions sliced pole to pole
Source: Linda Lum
Golden brown cooked onions
Source: Linda Lum
Beef broth added to the pan
Source: Linda Lum

Pasta is cooked and the chicken is nestled back into the pan, ready to serve

My  daughter and I are obsessed with watching   Master Chef Australia . This reality TV series, based on the original British MasterChef beg...